
Andriod programming – Posts 2: TextView, EditText, Button
Hello everyone, the day before we have created the first application, Hello world rồi. Today we begin to learn some basic interface elements in Android is TextView, EditText và Button.
[qads]
To get started, then you create a new Project (As in all 1 Hello world did) and open the xml file (activity_main.xml) as follows.

Here, The default will open the tab Design is for us preview tab interface and can drag and drop, but I do not want you to learn how to drag and drop, because it is very difficult to control the interface. So you go to the tab Text.
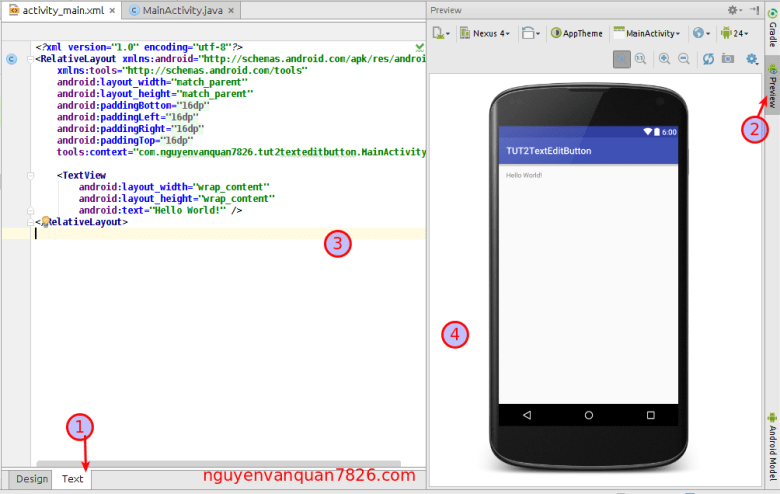
You can see the preview screen (4), if not, please click on Preview (2) to open it. Our interface code (3). Code to where we will track changes to it.
On the screen, you will see a code like this TextView.
<TextView
    android:layout_width="wrap_content"
    android:layout_height="wrap_content"
    android:text="Hello World!" />
This paragraph is to show a line “Hello world” the phone screen. You look at the line android:text=”Hello World!”, itself that, you can change the text for it with your name, Your lover's name,… and running applications will find the text to be changed.
So TextView is an ingredient that helps us to display text on screen. You remember Text – word, View – show.
Already. Follow, you replace the entire code in the file with the following code and see our interface.
<?xml version="1.0" encoding="utf-8"?>
<LinearLayout xmlns:android="http://schemas.android.com/apk/res/android"
    xmlns:tools="http://schemas.android.com/tools"
    android:layout_width="match_parent"
    android:layout_height="match_parent"
    android:orientation="vertical"
    android:paddingBottom="@dimen/activity_vertical_margin"
    android:paddingLeft="@dimen/activity_horizontal_margin"
    android:paddingRight="@dimen/activity_horizontal_margin"
    android:paddingTop="@dimen/activity_vertical_margin"
    tools:context="com.nguyenvanquan7826.tut2texteditbutton.MainActivity">

<TextView
    android:layout_width="wrap_content"
    android:layout_height="wrap_content"
    android:text="Hello World!" />

    <EditText
        android:layout_width="match_parent"
        android:layout_height="wrap_content"
        android:hint="Enter text here" />

    <Button
        android:layout_width="wrap_content"
        android:layout_height="wrap_content"
        android:text="Click me" />

</LinearLayout>
The interface will be as follows:

In the above code, We edited a bit and more 2 passage of EditText and Button.
- EditText is a component that allows us to enter data into.
- Button is a component that allows us to click to manipulate the handling something. To handle the need to add code inside Java.
Now you just run the application and watch it.
- Added his, it's not to the whole of 3 Components TextView, EditText, Button. In the next post, we will study and has additional knowledge about them.
- One more thing, the language we use to code the interface is XML. Each component in XML begin with open cards (VD's open card is TextView <TextView> ) and ends with a closing or closed within the opening tag (VD TextView close early in the opening />, LinearLayout the closing of the </LinearLayout>). This part of the interface code you will gradually understand more.
- I'm so focused on the interface code in this series, because according to her show, good interface code, the new Android learn better, school code, the Android interface is very bad bad.
Today all pause here! I wish you to learn effectively. If you have questions, suggestions or comments about the article, Please leave your message below the post offline!


learned to all things 2 already
Thanks Military! 🙂
Bài viết rất dễ hiểu. Thank!
rất dễ hiểu, thank!!
sao mình tải về, bên file xml có design và text mà mình khi tạo ra thì không có vậy…….